


我们经常会碰到这样的状况:当我们刚为吹风机或加热器插上电时,房间里的灯忽然全灭了,电视机也停止了工作。
这时你不得不绝望地打电话向客服求助,向他们描述刚刚发生的事情,而他们告诉你只需要打开空气开关就好了。可当你打开配电板后,却不知道哪个是空气开关。经过20分钟不断与客服确定断路器的位置后,你终于发现家中压根就没有什么所谓的空气开关。
如今大多数的远程协助都是通过语音电话或是短信进行的,这对于很多试图向客服阐述清楚问题并想弄清与其相关的新概念和专业术语的用户来说无疑是十分麻烦的。
幸运的是,现在出现了解决此类问题的视频聊天和AR技术。在本指南中,我会告诉你如何构建一个利用ARCore和视频聊天的Adroid app来创造互动体验。
要求
1.对Java和Android SDK要有基础到中级的了解。
2.能基本理解ARCore和增强现实技术的概念。
4.硬件:两台API运行级别在24或更高版本的Android设备并装有谷歌商店。
这里了解对设备的详细要求
注意:尽管不需要Java/Android的相关知识也能跟上,但在此过程中不会对 Java/ARCore 的某些概念进行额外解释。
总览
在本指南中,我们将构建一个支持AR功能的客户支持应用程序。 其中一个用户可以通过输入频道名称来创建频道,并以主播(需要支持的人)的身份加入该频道。 而另一个用户可以通过输入相同的频道名称,以观众(客户支持)的身份来加入同一频道。 当两个用户都在频道中时,主播可以向观众推送他们后置摄像头所拍摄的画面。 观众可以在自己的设备上绘图,而这些触摸输入会在主播端通过增强现实技术渲染出来!
在本章中我们会主要讲以下几步骤
1.创建新项目
2.创建UI
3.开启AR Core
4.开启主播语音视频
5.开启观众语音视频
6.远程协助功能
7.建立并检测设备
您可以通过我的Github找到相关 demo app 作为本文的参考。
创建新项目
首先,我们需开启Andnroid studio新建一个空白项目。
1.打开Android Studio并点击 开启一个新的Android Studio项目 。
2.在“ 选择项目 ”面板上,选择“ 手机和平板电脑 ”>“ 创建空的Activity ”,然后单击“ 下一步 ”。
3.单击 “完成”. 如果您需要安装任何插件,请按照屏幕上的说明进行操作。
集成SDK
在您所创建项目的 /app/build.gradle 文件中添加以下行:
dependencies {
    implementation fileTree(dir: 'libs', include: ['*.jar'])
    implementation 'androidx.appcompat:appcompat:1.1.0'
    implementation 'androidx.constraintlayout:constraintlayout:1.1.3'
    testImplementation 'junit:junit:4.12'
    androidTestImplementation 'androidx.test.ext:junit:1.1.1'
    androidTestImplementation 'androidx.test.espresso:espresso-core:3.2.0'

    //ARCore
    implementation 'com.google.ar:core:1.0.0'
    implementation 'de.javagl:obj:0.2.1'
    implementation 'com.google.android.material:material:1.1.0'
    implementation 'com.android.support:appcompat-v7:27.0.2'
    implementation 'com.android.support:design:27.0.2'

    //Video
    implementation 'io.agora.rtc:full-sdk:3.1.3'
}
更改后同步项目。 在**/app/src/main/AndroidManifest.xml**文件中添加以下项目权限:
<uses-permission android:name="android.permission.CAMERA" />
<uses-permission android:name="android.permission.INTERNET" />
<uses-permission android:name="android.permission.RECORD_AUDIO" />
<uses-permission android:name="android.permission.MODIFY_AUDIO_SETTINGS" />
<uses-permission android:name="android.permission.ACCESS_NETWORK_STATE" />
<uses-permission android:name="android.permission.WRITE_EXTERNAL_STORAGE" />
<uses-permission android:name="android.permission.BLUETOOTH" />
为了运行ARCore,我们还需要在AndroidManifest.xml文件中添加以下内容。 这表明该应用程序需要ARCore。
<uses-feature
    android:name="android.hardware.camera.ar"
    android:required="true" />
<application
...
<meta-data
    android:name="com.google.ar.core"
    android:value="required" />
</application>
创建UI
让我们为两个用户创建UI组件。 对于用AR技术远程共享世界的用户,我们将其称为“主播”。对于其他加入频道提供支持的用户,我们将其称为“观众”。 以下是我将使用的UI示例:
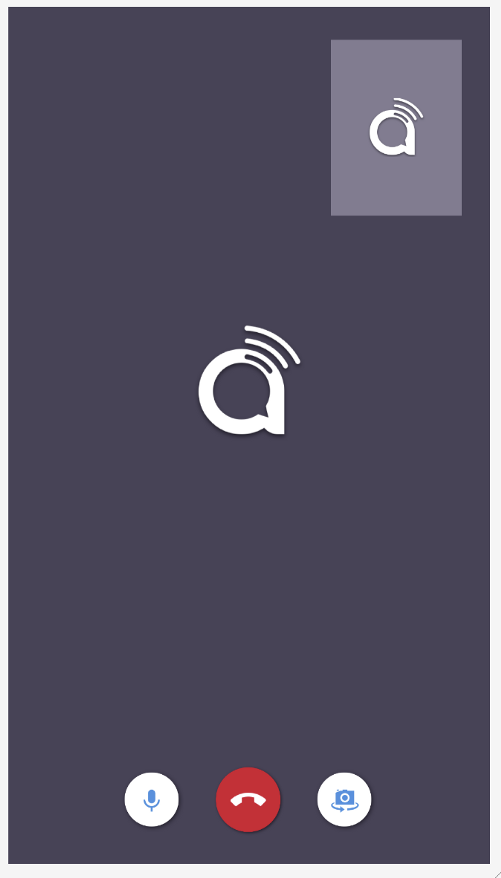

主播 UI (左) 观众UI (右)
请注意:您可以在 此处 找到UI的.xml文件。
主播的UI界面和观众UI界面之间的主要不同在于主播UI界面所使用的是 android.opengl.GLSurfaceView 来渲染AR相机视图,而观众UI界面是通过 RelativeLayout 来渲染从主播那里得到的AR相机视图 。
主播用户界面右上角的容器用来渲染观众本地相机的远程视频。 观众用户界面右上角的容器用来呈现观众的本地相机视图。
我们还将创建一个屏幕,供用户输入频道名称并以主播或观众的身份加入频道。
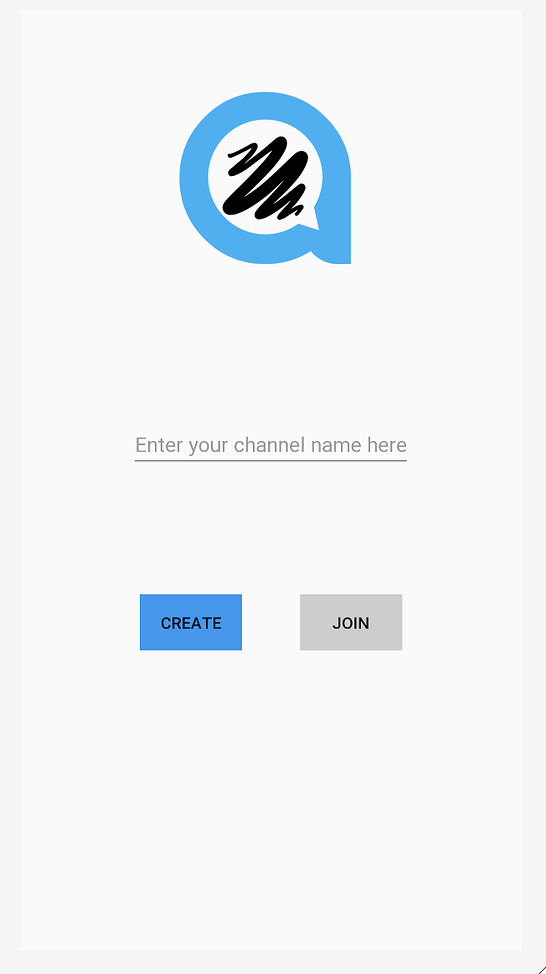
Join Channel UI
请注意:您可以在此处找到加入频道UI的.xml文件。
Channel UI下的逻辑非常简单。 如果用户单击“创建”按钮,它将跳至处理主播逻辑的主播Activity页面。 如果用户单击“ 加入”按钮,它将跳至处理观众互动逻辑的观众活动页面。 现在,我们需要为这两个活动定义逻辑。
创建ARCore
在项目内创建ARCore并不像我们想象中的那么难。在主播Activity的 OnResume() 方法中,我们需要创建一个Session实例。 Session实例用于管理AR系统状态并处理生命周期。 我们可以用它来接收允许访问相机图像的帧。 但是,在此之前,我们必须检查是否已安装ARCore。
@Override
protected void onResume() {
    super.onResume();

    if (mSession == null) {
        String message = null;
        try {
            switch (ArCoreApk.getInstance().requestInstall(this, !installRequested)) {
                case INSTALL_REQUESTED:
                    installRequested = true;
                    return;
                case INSTALLED:
                    break;
            }

            // ARCore requires camera permissions to operate. If we did not yet obtain runtime permission on Android M and above, now is a good time to ask the user for it.
            if (!CameraPermissionHelper.hasCameraPermission(this)) {
               CameraPermissionHelper.requestCameraPermission(this);
                return;
            }

            mSession = new Session(this);
        } catch (Exception e) {
            ...
        }
        // Create default config and check if supported.
        Config config = new Config(mSession);
        if (!mSession.isSupported(config)) {
            showSnackbarMessage("This device does not support AR", true);
        }
        ...
}
实现GLSurfaceView.Renderer
我们将使用GLSurfaceView渲染AR相机。 为此,主播Activity应实现 GLSurfaceView.Renderer 。 需要重写三个函数 :分别是onSurfaceCreated,onSurfaceChanged和onDrawFrame。
覆盖onSurfaceCreated
通常在开始渲染时使用的调用onSurfaceCreated方法中,我们需要对AR场景进行一些初始化设置。
1.创建一个BackgroundRenderer实例,并将其ID传输给会话相机。
2.初始化3D对象。 稍后,将3D对象在主播的AR世界中渲染。
3.初始化平面检测渲染。
4.初始化点云。
@Override
**public void** onSurfaceCreated(GL10 gl, EGLConfig config) {
GLES20. *glClearColor* (0.1f,0.1f,0.1f,1.0f);

<em>// Create the texture and pass it to ARCore session to be filled during update().</em>
**mBackgroundRenderer** .createOnGlThread( */*context=*/* **this** );
**if** ( **mSession** != **null** ) {
**mSession** .setCameraTextureName( **mBackgroundRenderer** .getTextureId());
} <em>// Prepare the other rendering objects.</em>
**try** {
**mVirtualObject** .createOnGlThread( */*context=*/* **this** , **"andy.obj"** , **"andy.png"** );
**mVirtualObject** .setMaterialProperties(0.0f, 3.5f, 1.0f, 6.0f);
**mVirtualObjectShadow** .createOnGlThread( */*context=*/* **this** ,
**"andy_shadow.obj"** , **"andy_shadow.png"** );
**mVirtualObjectShadow** .setBlendMode(ObjectRenderer.BlendMode. ***Shadow*** );
**mVirtualObjectShadow** .setMaterialProperties(1.0f, 0.0f, 0.0f, 1.0f);
} **catch** (IOException e) {
...
}
**try** {
**mPlaneRenderer** .createOnGlThread( */*context=*/* **this** , **"trigrid.png"** );
} **catch** (IOException e) {
...
}
**mPointCloud** .createOnGlThread( */*context=*/* **this** );
}
重写onSurfaceChanged
我们会在onSurfaceChanged方法中设置viewport,该方法会在完成Surface创建后、以及Surface尺寸发生改变的时候被调用。
@Override
public void onSurfaceChanged(GL10 gl, int width, int height) {
    ...
    GLES20.glViewport(0, 0, width, height);
}
覆盖onDrawFrame
在用于绘制当前帧的onDrawFrame方法中,我们需要为GLSurfaceView实现渲染逻辑。
- 清屏
2.从ARSession获取最新的帧。
3.捕获用户的点击并检查是否在场景中找到了任何平面。 如果是这样,请在该点创建一个锚点。
4.绘制背景。
5.绘制点云。
- 迭代所有锚点,并在每个锚点上绘制3D对象。
@Override
public void onDrawFrame(GL10 gl) {
    // Clear screen to notify driver it should not load any pixels from previous frame.
    GLES20.glClear(GLES20.GL_COLOR_BUFFER_BIT | GLES20.GL_DEPTH_BUFFER_BIT);
    ...

    try {
        // Obtain the current frame from ARSession. When the configuration is set to
        // UpdateMode.BLOCKING (it is by default), this will throttle the rendering to the camera framerate.
        Frame frame = mSession.update();
        Camera camera = frame.getCamera();

        // Handle taps. Handling only one tap per frame, as taps are usually low frequency
        // compared to frame rate.
        MotionEvent tap = queuedSingleTaps.poll();
        if (tap != null && camera.getTrackingState() == TrackingState.TRACKING) {
            for (HitResult hit : frame.hitTest(tap)) {
                // Check if any plane was hit, and if it was hit inside the plane polygon
                Trackable trackable = hit.getTrackable();
                // Creates an anchor if a plane or an oriented point was hit.
                if ((trackable instanceof Plane && ((Plane) trackable).isPoseInPolygon(hit.getHitPose()))
                        || (trackable instanceof Point
                        && ((Point) trackable).getOrientationMode()
                        == Point.OrientationMode.ESTIMATED_SURFACE_NORMAL)) {
                    // Hits are sorted by depth. Consider only closest hit on a plane or oriented point.
                    // Cap the number of objects created. This avoids overloading both the
                    // rendering system and ARCore.
                    if (anchors.size() >= 250) {
                        anchors.get(0).detach();
                        anchors.remove(0);
                    }
                    // Adding an Anchor tells ARCore that it should track this position in
                    // space. This anchor is created on the Plane to place the 3D model
                    // in the correct position relative both to the world and to the plane.
                    anchors.add(hit.createAnchor());
                    break;
                }
            }
        }

        // Draw background.
        mBackgroundRenderer.draw(frame);

        ...
        if (isShowPointCloud()) {
            // Visualize tracked points.
            PointCloud pointCloud = frame.acquirePointCloud();
            mPointCloud.update(pointCloud);
            mPointCloud.draw(viewmtx, projmtx);

            // Application is responsible for releasing the point cloud resources after
            // using it.
            pointCloud.release();
        }

        ...

        if (isShowPlane()) {
            // Visualize planes.
            mPlaneRenderer.drawPlanes(
                    mSession.getAllTrackables(Plane.class), camera.getDisplayOrientedPose(), projmtx);
        }

        // Visualize anchors created by touch.
        float scaleFactor = 1.0f;

        for (Anchor anchor : anchors) {
            if (anchor.getTrackingState() != TrackingState.TRACKING) {
                continue;
            }
            // Get the current pose of an Anchor in world space. The Anchor pose is updated
            // during calls to session.update() as ARCore refines its estimate of the world.
            anchor.getPose().toMatrix(mAnchorMatrix, 0);


            // Update and draw the model and its shadow.
            mVirtualObject.updateModelMatrix(mAnchorMatrix, mScaleFactor);
            mVirtualObjectShadow.updateModelMatrix(mAnchorMatrix, scaleFactor);
            mVirtualObject.draw(viewmtx, projmtx, lightIntensity);
            mVirtualObjectShadow.draw(viewmtx, projmtx, lightIntensity);
        }
    } catch (Throwable t) {
        ...
    }
}
注意:一些概念并不出自这里。请点击 Github code 以便更好了解。
Enable Streamer’s Video Call
启用主播的视频通话
设置来自主播的视频通话
在AgoraARStreamerActivity的**onCreate()**方法中,执行以下操作:
1.初始化GLSurfaceView onTouchListener
2.初始化Agora RtcEngine
3.设置自定义视频源
4.加入频道
1.初始化GLSurfaceView onTouchListener
为GLSurfaceView设置onTouchListener,允许我们捕获接触点并在该位置设置AR锚点。
mGestureDetector = new GestureDetector(this,
        new GestureDetector.SimpleOnGestureListener() {
            @Override
            public boolean onSingleTapUp(MotionEvent e) {
                onSingleTap(e);
                return true;
            }

            @Override
            public boolean onDown(MotionEvent e) {
                return true;
            }
        });

mSurfaceView.setOnTouchListener(new View.OnTouchListener() {
    @Override
    public boolean onTouch(View v, MotionEvent event) {
        return mGestureDetector.onTouchEvent(event);
    }
});
当GestureDetector检测到单击时,它将触发onSingleTap。 在这种方法中,我们会将这次单击添加到single tap队列中。
private void onSingleTap(MotionEvent e) {
    queuedSingleTaps.offer(e);
}
还记得我们在onDrawFrame方法中创建锚点吗? 我们从 queuedSingleTaps .中轮询了用户的点击。 并将单击添加到队列的位置。
2.初始化Agora RtcEngine
为了初始化Agora视频引擎,只需简单地调用**RtcEngine.create(context,appid,RtcEventHandler)**创建一个RtcEngine实例就好了。
mRtcEngine = RtcEngine.create(this, getString(R.string.private_broadcasting_app_id), mRtcEventHandler);
为了在参数中获取应用程序ID,请按照下列步骤操作:
1.在Agora控制台中创建一个Agora项目。
2.单击左侧导航面板上的“项目管理”选项卡。
3.单击“创建”,然后按照屏幕上的说明设置项目名称,选择身份验证机制,然后单击“提交”。
4.在“项目管理”页面上,找到你的App ID。
mRtcEventHandler是用于管理RtcEngine发生的不同事件的处理程序。 让我们用一些基本事件处理程序来实现它。
private IRtcEngineEventHandler mRtcEventHandler = new IRtcEngineEventHandler() {
    @Override
    public void onJoinChannelSuccess(final String channel, int uid, int elapsed) {
        //when local user joined the channel
        ...
    }

    @Override
    public void onRemoteVideoStateChanged(final int uid, int state, int reason, int elapsed) {
        super.onRemoteVideoStateChanged(uid, state, reason, elapsed);
        //when remote user join the channel
        if (state == Constants.REMOTE_VIDEO_STATE_STARTING) {
            runOnUiThread(new Runnable() {
                @Override
                public void run() {
                    addRemoteRender(uid);
                }
            });
        }
    }

    @Override
    public void onUserOffline(int uid, int reason) {
        //when remote user leave the channel
        runOnUiThread(new Runnable() {
            @Override
            public void run() {
                removeRemoteRender();
            }
        });
    }

    @Override
    public void onStreamMessage(int uid, int streamId, byte[] data) {
        //when received the remote user's stream message data
        ...
    }
};
检查每个事件处理程序方法顶部的注释,以便更好地理解它们。 有关你能使用的更多RtcEngine事件处理程序,请查看Agora Rtc API文档。
请注意:屏幕上显示视频视图的某些逻辑已隐藏。 您可以查看Github demo app,以更好地了解如何在屏幕上动态显示和删除视频视图。
3.设置自定义视频源
在应用程序中,我们想让流媒体将其AR世界发送给观众。 因此,它们发送的视频来自自定义视频源,而不是一般的相机视频流。 幸运的是,Agora Video SDK提供了API方法来发送自定义视频源。
创建一个名为AgoraVideoSource并实现IVideoSource接口的类。 IVideoSource接口定义了一组协议以实现自定义视频源,并将其传递给底层媒体引擎以替换默认视频源。
public class AgoraVideoSource implements IVideoSource {
    private IVideoFrameConsumer mConsumer;

    @Override
    public boolean onInitialize(IVideoFrameConsumer iVideoFrameConsumer) {
        mConsumer = iVideoFrameConsumer;
        return true;
    }

    @Override
    public boolean onStart() {
        return true;
    }

    @Override
    public void onStop() {
    }

    @Override
    public void onDispose() {
    }

    @Override
    public int getBufferType() {
        return MediaIO.BufferType.BYTE_ARRAY.intValue();
    }

    public IVideoFrameConsumer getConsumer() {
        return mConsumer;
    }
}
在AgoraARStreamerActivity内的onCreate方法中,调用构造函数方法以创建AgoraVideoSource实例。
mSource = new AgoraVideoSource();
创建一个名为AgoraVideoRender并实现IVideoSink接口的类。 IVideoSink接口定义了一组协议以创建自定义的视频接收器并将其传递给媒体引擎以替换默认的视频渲染器。
public class AgoraVideoRender implements IVideoSink {
    private Peer mPeer;
    private boolean mIsLocal;

    public AgoraVideoRender(int uid, boolean local) {
        mPeer = new Peer();
        mPeer.uid = uid;
        mIsLocal = local;
    }

    public Peer getPeer() {
        return mPeer;
    }

    @Override
    public boolean onInitialize() {
        return true;
    }

    @Override
    public boolean onStart() {
        return true;
    }

    @Override
    public void onStop() {

    }

    @Override
    public void onDispose() {

    }

    @Override
    public long getEGLContextHandle() {
        return 0;
    }

    @Override
    public int getBufferType() {
        return MediaIO.BufferType.BYTE_BUFFER.intValue();
    }

    @Override
    public int getPixelFormat() {
        return MediaIO.PixelFormat.RGBA.intValue();
    }

    @Override
    public void consumeByteBufferFrame(ByteBuffer buffer, int format, int width, int height, int rotation, long ts) {
        if (!mIsLocal) {
            mPeer.data = buffer;
            mPeer.width = width;
            mPeer.height = height;
            mPeer.rotation = rotation;
            mPeer.ts = ts;
        }
    }

    @Override
    public void consumeByteArrayFrame(byte[] data, int format, int width, int height, int rotation, long ts) {

    }

    @Override
    public void consumeTextureFrame(int texId, int format, int width, int height, int rotation, long ts, float[] matrix) {

    }

}
与AgoraVideoSource实例类似,我们通过调用其构造函数来创建AgoraVideoRender实例。 在这里,我们将uid设为0来表示本地视频渲染。
mRender = new AgoraVideoRender(0, true);
创建两个实例后,我们需要设置自定义AR视频源和本地视频渲染器。
mRtcEngine.setVideoSource(mSource);
mRtcEngine.setLocalVideoRenderer(mRender);
但是,我们设置的视频源中没有数据。 我们需要将AR相机视图传到我们的视频源。 为此,我们将在之前重写的onDrawFrame方法的末尾添加逻辑。
@Override
public void onDrawFrame(GL10 gl) {
    ...
    final Bitmap outBitmap = Bitmap.createBitmap(mSurfaceView.getWidth(), mSurfaceView.getHeight(), Bitmap.Config.ARGB_8888);
    PixelCopy.request(mSurfaceView, outBitmap, new PixelCopy.OnPixelCopyFinishedListener() {
        @Override
        public void onPixelCopyFinished(int copyResult) {
            if (copyResult == PixelCopy.SUCCESS) {
                sendARView(outBitmap);
            } else {
                Toast.makeText(AgoraARCoreActivity.this, "Pixel Copy Failed", Toast.LENGTH_SHORT);
            }
        }
    }, mSenderHandler);
}
private void sendARView(Bitmap bitmap) {
    if (bitmap == null) return;

    if (mSource.getConsumer() == null) return;

    //Bitmap bitmap = source.copy(Bitmap.Config.ARGB_8888,true);
    int width = bitmap.getWidth();
    int height = bitmap.getHeight();

    int size = bitmap.getRowBytes() * bitmap.getHeight();
    ByteBuffer byteBuffer = ByteBuffer.allocate(size);
    bitmap.copyPixelsToBuffer(byteBuffer);
    byte[] data = byteBuffer.array();

    mSource.getConsumer().consumeByteArrayFrame(data, MediaIO.PixelFormat.RGBA.intValue(), width, height, 0, System.currentTimeMillis());
}
这里的逻辑是将GLSurfaceView复制到点阵图,并将点阵图缓冲区发送到我们的自定义视频源。
4.加入频道
现在,我们准备通过传递上一个Activity的channelName来调用RtcEngine实例上的**joinChannel()**来加入频道。
mRtcEngine.joinChannel(null, channelName, "", 0);
注意:参数中的token可以设置为null。
通过调用此函数并成功加入频道,RtcEngineEventHandler将触发我们在上一步中完成的**onJoinChannelSuccess()**方法。 它将返回由Agora服务器生成的唯一的Agora视频ID。
至此,主播可以加入频道并向观众宣传他们的AR世界。
启用观众的视频通话
启用观众的视频通话与我们为主播编写的视频通话非常相似。 唯一的区别是在初始化RtcEngine之后设置本地相机视频。
mRtcEngine.enableVideo();
mLocalView = RtcEngine.CreateRendererView(getBaseContext());
mLocalContainer.addView(mLocalView);
mLocalView.setZOrderMediaOverlay(true);

VideoCanvas localVideoCanvas = new VideoCanvas(mLocalView, VideoCanvas.RENDER_MODE_HIDDEN, 0);
mRtcEngine.setupLocalVideo(localVideoCanvas);
这会将观众的本地相机视图显示在屏幕的右上角。
注意:想要更深入理解,这里可参考Github代码。
现在,我们可以在主播和观众之间发起视频通话。 但是,这个远程协助应用程序功能仍不齐全,因为观众无法与流媒体的AR世界互动。 接下来,我们将开始通过ARCore实现观众标记功能。
远程协助功能
理想情况下,当远程技术人员(观众)想通过在屏幕上绘图来指导客户(主播)时,这个功能应能提供帮助。 该标记应立即在客户端显示,并应保持与绘制位置相同的位置。
为了实现这一点,我们将收集观众的接触点,并将其发送给主播。 只要主播接收到这些触摸点,我们就可以在流光的屏幕上模拟触摸以创建AR对象。
我们首先要收集观众的触摸位置。 在AgoraARAudienceActivity的onCreate方法中,在远程视图容器上设置触摸侦测器。 收集接近屏幕中心的所有接触点位置。 使用Agora API方法sendStreamMessage将它们作为数据流消息发送到主播。 这将触发主播的onStreamMessage回调。 由于用户每秒只能发送6kB数据,因此只要我们收集了10个接触点,我们就会将其发送出去。
mRemoteContainer.setOnTouchListener(new View.OnTouchListener() {
    @Override
    public boolean onTouch(View v, MotionEvent event) {
        switch (event.getAction()) {
            case MotionEvent.ACTION_MOVE:
                //get the touch position related to the center of the screen
                touchCount++;
                float x = event.getRawX() - ((float)mWidth / 2);
                float y = event.getRawY() - ((float)mHeight / 2);
                floatList.add(x);
                floatList.add(y);
                if (touchCount == 10) {
                    //send the touch positions when collected 10 touch points
                    sendMessage(touchCount, floatList);
                    touchCount = 0;
                    floatList.clear();
                }
                break;
            case MotionEvent.ACTION_UP:
                //send touch positions after the touch motion
                sendMessage(touchCount, floatList);
                touchCount = 0;
                floatList.clear();
                break;
        }
        return true;
    }
});
这是sendMessage逻辑:
/**
 * send the touch points as a byte array to Agora sdk
 * @param touchCount
 * @param floatList
 */
private void sendMessage(int touchCount, List<Float> floatList) {
    byte[] motionByteArray = new byte[touchCount * 4 * 2];
    for (int i = 0; i < floatList.size(); i++) {
        byte[] curr = ByteBuffer.allocate(4).putFloat(floatList.get(i)).array();
        for (int j = 0; j < 4; j++) {
            motionByteArray[i * 4 + j] = curr[j];
        }
    }
    mRtcEngine.sendStreamMessage(dataChannel, motionByteArray);
}
现在,在AgoraARStreamerActivity中,我们需要覆盖onStreamMessage回调,以接收观众发送的接触点并模拟主播屏幕上的触摸操作。
@Override
public void onStreamMessage(int uid, int streamId, byte[] data) {
    //when received the remote user's stream message data
    super.onStreamMessage(uid, streamId, data);
    int touchCount = data.length / 8;       //number of touch points from data array
    for (int k = 0; k < touchCount; k++) {
        //get the touch point's x,y position related to the center of the screen and calculated the raw position
        byte[] xByte = new byte[4];
        byte[] yByte = new byte[4];
        for (int i = 0; i < 4; i++) {
            xByte[i] = data[i + 8 * k];
            yByte[i] = data[i + 8 * k + 4];
        }
        float convertedX = ByteBuffer.wrap(xByte).getFloat();
        float convertedY = ByteBuffer.wrap(yByte).getFloat();
        float center_X = convertedX + ((float) mWidth / 2);
        float center_Y = convertedY + ((float) mHeight / 2);

        //simulate the clicks based on the touch position got from the data array
        instrumentation.sendPointerSync(MotionEvent.obtain(SystemClock.uptimeMillis(), SystemClock.uptimeMillis(), MotionEvent.ACTION_DOWN, center_X, center_Y, 0));
        instrumentation.sendPointerSync(MotionEvent.obtain(SystemClock.uptimeMillis(), SystemClock.uptimeMillis(), MotionEvent.ACTION_UP, center_X, center_Y, 0));
    }
}
在设备上构建和测试
这就是构建远程协助应用程序所需要的全部程序。 现在就可以运行我们的程序啦!
转到Android Studio,确保已插入您的Android设备,然后单击“运行”在设备上构建应用程序。别忘了两个设备上都要构建应用程序才能开始视频通话。 两种设备都必须运行Android API级别24或更高版本,并且最初都自带Google Play商店。
您可以在此处查看详细的设备要求。
大功告成!
恭喜你! 您只需使用增强现实功能构建自己的远程协助应用程序即可!
感谢您的关注。欢迎发表评论! 这是您可能遇到的任何问题的电子邮件地址。devrel@agora.io。

