


(以下内容来自开发者分享,不代表 OpenHarmony 项目群工作委员会观点)

上一章我们讲解了应用编译环境准备,设备编译环境准备,开发板烧录,将一个最简单的 OpenAtom OpenHarmony(以下简称“OpenHarmony”)程序安装到我们的标准设备上。
本章是 OpenHarmony 标准设备应用开发的第二篇文章。我们通过知识体系新开发的几个基于 OpenHarmony3.1 Beta 标准系统的样例:分布式音乐播放、传炸弹、购物车等样例,分别介绍下音乐播放、显示动画、动画转场(页面间转场)三个进阶技能。首先我们来讲如何在 OpenHarmony 中实现音乐的播放。
分布式音乐播放
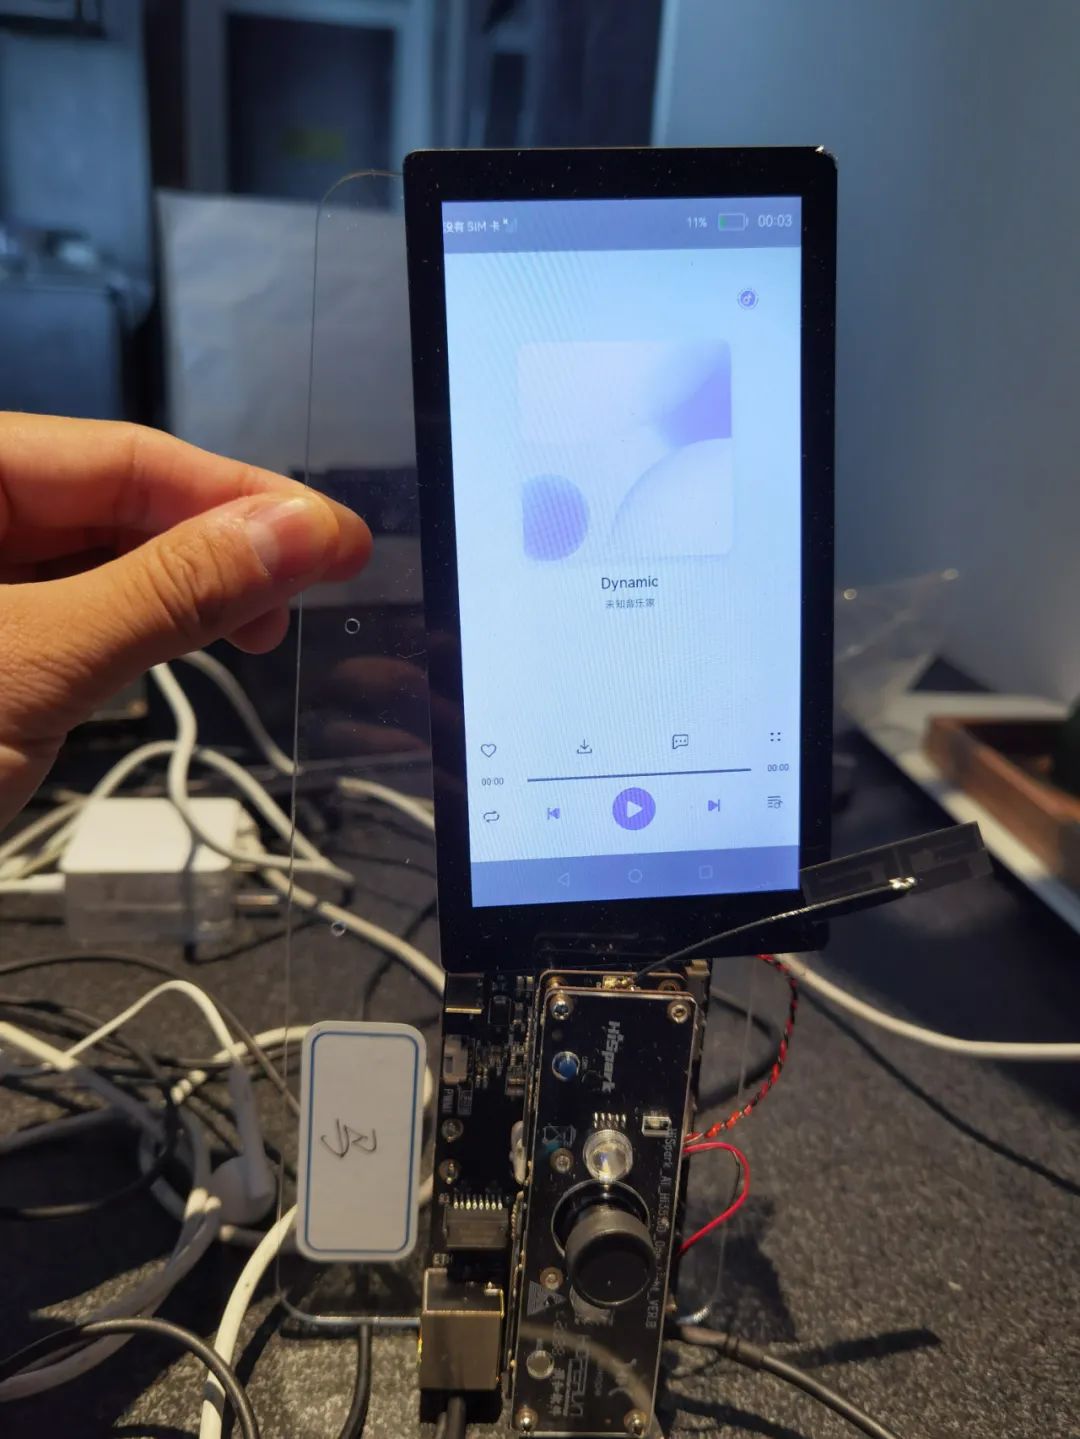
通过分布式音乐播放器,大家可以学到一些 ArkUI 组件和布局在 OpenHarmony 中是如何使用的,以及如何在自己的应用中实现音乐的播放,暂停等相关功能。应用效果如下图所示:
1.1 界面布局
整体布局效果如下图所示
代码参考链接 :
首先是页面整体布局,部分控件是以模块的方式放在整体布局中的,如 operationPannel()、sliderPannel()、playPannel() 模块。页面整体布是由 Flex 控件中,包含 Image、Text 以及刚才所说的三个模块所构成。
build() {
  Flex({ direction: FlexDirection.Column, alignItems: ItemAlign.Center, justifyContent: FlexAlign.SpaceBetween }) {
    Flex({ direction: FlexDirection.Column, alignItems: ItemAlign.Center }) {
      Flex({ direction: FlexDirection.Row, justifyContent: FlexAlign.End }) {
        Image($r("app.media.icon_liuzhuan")).width(32).height(32)
      }.padding({ right: 32 }).onClick(() => {
        this.onDistributeDevice()
      })

      Flex({ direction: FlexDirection.Row, justifyContent: FlexAlign.Center }) {
        Image($r("app.media.Bg_classic")).width(312).height(312)
      }.margin({ top: 24 })

      Text(this.currentMusic.name).fontSize(20).fontColor("#e6000000").margin({ top: 10 })
      Text("未知音乐家").fontSize(14).fontColor("#99000000").margin({ top: 10 })
    }.flexGrow(1)

    Flex({ direction: FlexDirection.Column, alignItems: ItemAlign.Center, justifyContent: FlexAlign.End }) {
      this.operationPannel()
      this.sliderPannel()
      this.playPannel()
    }.height(200)
  }
  .linearGradient({
    angle: 0,
    direction: GradientDirection.Bottom,
    colors: this.currentMusic.backgourdColor
  }).padding({ top: 48, bottom: 24, left: 24, right: 24 })
  .width('100%')
  .height('100%')
}
operationPannel() 模块的布局,该部分代码对应图片中的心形图标,下载图标,评论图标更多图标这一部分布局。其主要是在 Flex 中包含 Image 所构成代码如下:
@Builder operationPannel() {
  Flex({ direction: FlexDirection.Row, alignItems: ItemAlign.Center, justifyContent: FlexAlign.SpaceBetween }) {
    Image($r("app.media.icon_music_like")).width(24).height(24)
    Image($r("app.media.icon_music_download")).width(24).height(24)
    Image($r("app.media.icon_music_comment")).width(24).height(24)
    Image($r("app.media.icon_music_more")).width(24).height(24)
  }.width('100%').height(49).padding({ bottom: 25 })
}
sliderPannel() 模块代码布局。该部分对应图片中的显示播放时间那一栏的控件。整体构成是在 Flex 中,包含 Text、Slider、Text 三个控件。具体代码如下:
@Builder sliderPannel() {
  Flex({ direction: FlexDirection.Row, alignItems: ItemAlign.Center, justifyContent: FlexAlign.Center }) {
    Text(this.currentTimeText).fontSize(12).fontColor("ff000000").width(40)
    Slider({
      value: this.currentProgress,
      min: 0,
      max: 100,
      step: 1,
      style: SliderStyle.INSET
    })
      .blockColor(Color.White)
      .trackColor(Color.Gray)
      .selectedColor(Color.Blue)
      .showSteps(true)
      .flexGrow(1)
      .margin({ left: 5, right: 5 })
      .onChange((value: number, mode: SliderChangeMode) => {
        if (mode == 2) {
          CommonLog.info('aaaaaaaaaaaaaa1: ' + this.currentProgress)
          this.onChangeMusicProgress(value, mode)
        }
      })

    Text(this.totalTimeText).fontSize(12).fontColor("ff000000").width(40)
  }.width('100%').height(18)
}
playPannel() 模块代码对应图片中的最底部播放那一栏五个图标所包含的一栏。整体布局是 Flex 方向为横向,其中包含五个 Image 所构成。具体代码如下:
@Builder playPannel() {
  Flex({ direction: FlexDirection.Row, alignItems: ItemAlign.Center, justifyContent: FlexAlign.SpaceBetween }) {
    Image($r("app.media.icon_music_changemode")).width(24).height(24).onClick(() => {
      this.onChangePlayMode()
    })
    Image($r("app.media.icon_music_left")).width(32).height(32).onClick(() => {
      this.onPreviousMusic()
    })
    Image(this.isPlaying ? $r("app.media.icon_music_play") : $r("app.media.icon_music_stop"))
      .width(80)
      .height(82)
      .onClick(() => {
        this.onPlayOrPauseMusic()
      })
    Image($r("app.media.icon_music_right")).width(32).height(32).onClick(() => {
      this.onNextMusic()
    })
    Image($r("app.media.icon_music_list")).width(24).height(24).onClick(() => {
      this.onShowMusicList()
    })
  }.width('100%').height(82)
}
希望通过上面这些布局的演示,可以让大家学到一些部分控件在 OpenHarmony 中的运用,这里使用的 Arkui 布局和 HarmonyOS* 是一致的,目前 HarmonyOS* 手机还没有发布 Arkui 的版本,大家可以在 OpenHarmony 上抢先体验。常用的布局和控件还有很多,大家可以在下面的链接中找到更多的详细信息。
*编者注:HarmonyOS 是基于开放原子开源基金会旗下开源项目 OpenHarmony 开发的面向多种全场景智能设备的商用版本。是结合其自有特性和能力开发的新一代智能终端操作系统。
官网参考链接:
1.2 播放音乐
play(seekTo) {
  if (this.player.state == 'playing' && this.player.src == this.getCurrentMusic().url) {
    return
  }

  if (this.player.state == 'idle' || this.player.src != this.getCurrentMusic().url) {
    CommonLog.info('Preload music url = ' + this.getCurrentMusic().url)
    this.player.reset()
    this.player.src = this.getCurrentMusic().url
    this.player.on('dataLoad', () => {
      CommonLog.info('dataLoad duration=' + this.player.duration)
      this.totalTimeMs = this.player.duration
      if (seekTo > this.player.duration) {
        seekTo = -1
      }
      this.player.on('play', (err, action) => {
        if (err) {
          CommonLog.info(`MusicPlayer[PlayerModel] error returned in play() callback`)
          return
        }
        if (seekTo > 0) {
          this.player.seek(seekTo)
        }
      })

      this.player.play()
      this.statusChangeListener()
      this.setProgressTimer()
      this.isPlaying = true
    })
  }
  else {
    if (seekTo > this.player.duration) {
      seekTo = -1
    }
    this.player.on('play', (err, action) => {
      if (err) {
        CommonLog.info(`MusicPlayer[PlayerModel] error returned in play() callback`)
        return
      }
      if (seekTo > 0) {
        this.player.seek(seekTo)
      }
    })

    this.player.play()
    this.setProgressTimer()
    this.isPlaying = true
  }
}
1.3 音乐暂停
pause() {
  CommonLog.info("pause music")
  this.player.pause();
  this.cancelProgressTimer()
  this.isPlaying = false
}
具体代码:
分布式音乐播放器项目下载链接:
接下来我们讲解如何在 OpenHarmony 中实现显示动画的效果。
显示动画
我们以传炸弹小游戏中的显示动画效果为例,效果如下图所示。
通过本小节,大家在上一小节的基础上,学到更多 ArkUI 组件和布局在 OpenHarmony 中的应用,以及如何在自己的应用中实现显示动画的效果。
代码链接:
实现步骤:
2.1 编写弹窗布局:将游戏失败文本、炸弹图片和再来一局按钮图片放置于Column容器中;
2.2 用变量来控制动画起始和结束的位置:用Flex容器包裹炸弹图片,并用 @State 装饰变量 toggle,通过变量来动态修改 Flex 的 direction 属性;布局代码如下:
@State toggle: boolean = true
private controller: CustomDialogController
@Consume deviceList: RemoteDevice[]
private confirm: () => void
private interval = null

build() {
  Column() {
    Text('游戏失败').fontSize(30).margin(20)
    Flex({
      direction: this.toggle ? FlexDirection.Column : FlexDirection.ColumnReverse,
      alignItems: ItemAlign.Center
    })
    {
      Image($r("app.media.bomb")).objectFit(ImageFit.Contain).height(80)
    }.height(200)

    Image($r("app.media.btn_restart")).objectFit(ImageFit.Contain).height(120).margin(10)
      .onClick(() => {
        this.controller.close()
        this.confirm()
      })
  }
   .width('80%')
   .margin(50)
   .backgroundColor(Color.White)
}
2.3设置动画效果:使用 animateTo 显式动画接口炸弹位置切换时添加动画,并且设置定时器定时执行动画,动画代码如下:
aboutToAppear() {
   this.setBombAnimate()
}

setBombAnimate() {
   let fun = () => {
      this.toggle = !this.toggle;
   }
   this.interval = setInterval(() => {
      animateTo({ duration: 1500, curve: Curve.Sharp }, fun)
   }, 1600)
}
项目下载链接:
https://gitee.com/openharmony-sig/knowledge_demo_temp/tree/master/FA/Entertainment/BombGame
转场动画(页面间转场)
我们同样希望在本小节中,可以让大家看到更多的 ArkUI 中的组件和布局在 OpenHarmony 中的使用,如何模块化的使用布局,让自己的代码更简洁易读,以及在应用中实现页面间的转场动画效果。
下图是分布式购物车项目中的转场动画效果图
代码参考链接:
页面布局效果图
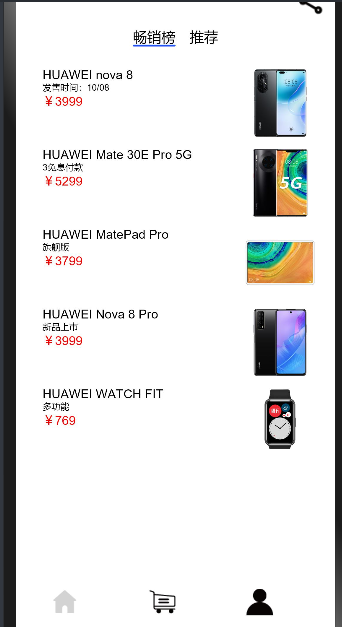
整体布局由 Column、Scroll、Flex、Image 以及 GoodsHome()、MyInfo()、HomeBottom() 构成,该三个模块我们会分别说明。具体代码如下:
build() {
  Column() {
    Scroll() {
      Column() {
        if (this.currentPage == 1) {
          Flex({ direction: FlexDirection.Row, justifyContent: FlexAlign.End }) {
            Image($r("app.media.icon_share"))
              .objectFit(ImageFit.Cover)
              .height('60lpx')
              .width('60lpx')
          }
          .width("100%")
          .margin({ top: '20lpx', right: '50lpx' })
          .onClick(() => {
            this.playerDialog.open()
          })

          GoodsHome({ goodsItems: this.goodsItems})
        } else if (this.currentPage == 3) {
        //我的
        MyInfo()
        }
      }
      .height('85%')
    }
    .flexGrow(1)

    HomeBottom({ remoteData: this.remoteData})

  }
  .backgroundColor("white")
}
GoodsHome() 模块对应效果图中间显示商品的部分,其主要结构为 TabContent 中包含的两个 List 条目所构成。具体代码如下:
@Component
struct GoodsHome {
  private goodsItems: GoodsData[]
  @Consume ShoppingCartsGoods :any[]
  build() {
    Column() {
      Tabs() {
        TabContent() {
          GoodsList({ goodsItems: this.goodsItems});
        }
        .tabBar("畅销榜")
        .backgroundColor(Color.White)

        TabContent() {
          GoodsList({ goodsItems: this.goodsItems});
        }
        .tabBar("推荐")
        .backgroundColor(Color.White)
      }
      .barWidth(500)
      .barHeight(50)
      .scrollable(true)
      .barMode(BarMode.Scrollable)
      .height('980lpx')

    }
    .alignItems(HorizontalAlign.Start)
    .width('100%')
  }
}
上面代码中的 GoodsList() 为每个 list 条目对应显示的信息,会便利集合中的数据,然后显示在对用的 item 布局中,具体代码如下:
@Component
struct GoodsList {
  private goodsItems: GoodsData[]
  @Consume ShoppingCartsGoods :any[]
  build() {
    Column() {
      List() {
        ForEach(this.goodsItems, item => {
          ListItem() {
            GoodsListItem({ goodsItem: item})
          }
        }, item => item.id.toString())
      }
      .width('100%')
      .align(Alignment.Top)
      .margin({ top: '10lpx' })
    }
  }
}
最后就是 list 的 item 布局代码。具体代码如下:
@Component
struct GoodsListItem {
  private goodsItem: GoodsData
  @State scale: number = 1
  @State opacity: number = 1
  @State active: boolean = false
  @Consume ShoppingCartsGoods :any[]
  build() {
    Column() {
      Navigator({ target: 'pages/DetailPage' }) {
        Row({ space: '40lpx' }) {
          Column() {
            Text(this.goodsItem.title)
              .fontSize('28lpx')
            Text(this.goodsItem.content)
              .fontSize('20lpx')
            Text('¥' + this.goodsItem.price)
              .fontSize('28lpx')
              .fontColor(Color.Red)
          }
          .height('160lpx')
          .width('50%')
          .margin({ left: '20lpx' })
          .alignItems(HorizontalAlign.Start)

        Image(this.goodsItem.imgSrc)
          .objectFit(ImageFit.ScaleDown)
          .height('160lpx')
          .width('40%')
          .renderMode(ImageRenderMode.Original)
          .margin({ right: '20lpx', left: '20lpx' })

      }
      .height('180lpx')
      .alignItems(VerticalAlign.Center)
      .backgroundColor(Color.White)
    }
    .params({ goodsItem: this.goodsItem ,ShoppingCartsGoods:this.ShoppingCartsGoods})
    .margin({ left: '40lpx' })
  }
}
备注:MyInfo() 模块对应的事其它也免得布局,这里就不做说明。
最后我们来说一下,页面间的页面间的转场动画,其主要是通过在全局 pageTransition 方法内配置页面入场组件和页面退场组件来自定义页面转场动效。具体代码如下:
// 转场动画使用系统提供的多种默认效果(平移、缩放、透明度等)
pageTransition() {
  PageTransitionEnter({ duration: 1000 })
    .slide(SlideEffect.Left)
  PageTransitionExit({ duration: 1000  })
    .slide(SlideEffect.Right)
}
项目下载链接地址:
官网参考链接:
通过上述讲解,我们就在自己的代码中实现音乐的播放,显示动画,页面间转场动画等效果。在接下来的一章中,我们会讲解如何在 OpenHarmony 通过分布式数据管理,实现设备之间数据如何同步刷新。
在接下来的一章中,我们将会讲解分布式数据管理在 OpenHarmony 中如何实现多台设备间的数据同步更新。