


随着大量公司将办公会议、产品发布等改为网上进行后, 视频通信的安全性越来越成为受关注的重点。声网平台在 2.1.0 版本之后,通过使用 AccessToken 认证统一了视频通话RTC、录制、消息通讯RTM等各 SDK 的安全认证形式,相较于原先的 DynmicKey 更加方便于用户使用。
.NET Core 是微软的跨平台开发框架,可运行在 Windows、Linux、macOS 等操作系统之上,通过命令行工具就可以方便的创建、编译、运行,并可搭配 Docker 容器使用,方便嵌入微服务架构中。
本文将基于 .NET Core 3.1 版本说明如何建立一个 Agora RTC Token 服务,同样这个服务也可以用于录制和 RTM SDK中。
预备知识
- 本文默认读者了解基本的 C# 编程知识,如果有需要可以访问C#文档 进行了解。
- 本文需要 ASP.NET Core 及相关的 WebAPI 知识,如果有需要可以访问 ASP.NET文档进行了解。
- 本文会有一点点 Git 相关的使用,但不是必要的。
本文所需工具
- .NET Core SDK - 包括 .NET Core 运行时、开发包及命令行工具。
- Visual Studio Code - 微软推出的跨平台开发工具,你也可以使用自己喜欢或习惯的开发工具。
- .NET Core开发环境配置 - 如果你刚开始使用 Visual Studio Code,推荐阅读这个链接中的安装配置。
- Git - 本文会使用到 Git 但不是必要条件,在相应章节会进行说明。
项目创建
- 打开终端,进入你平时开发目录
- 运行以下命令
dotnet new webapi -o AgoraTokenServer
code -r AgoraTokenServer- 如果你正确的安装了 Visual Studio Code 的话,这时系统应该会打开 Visual Studio Code 程序并将 AgoraTokenServer 这个项目显示在左侧,如下图所示:
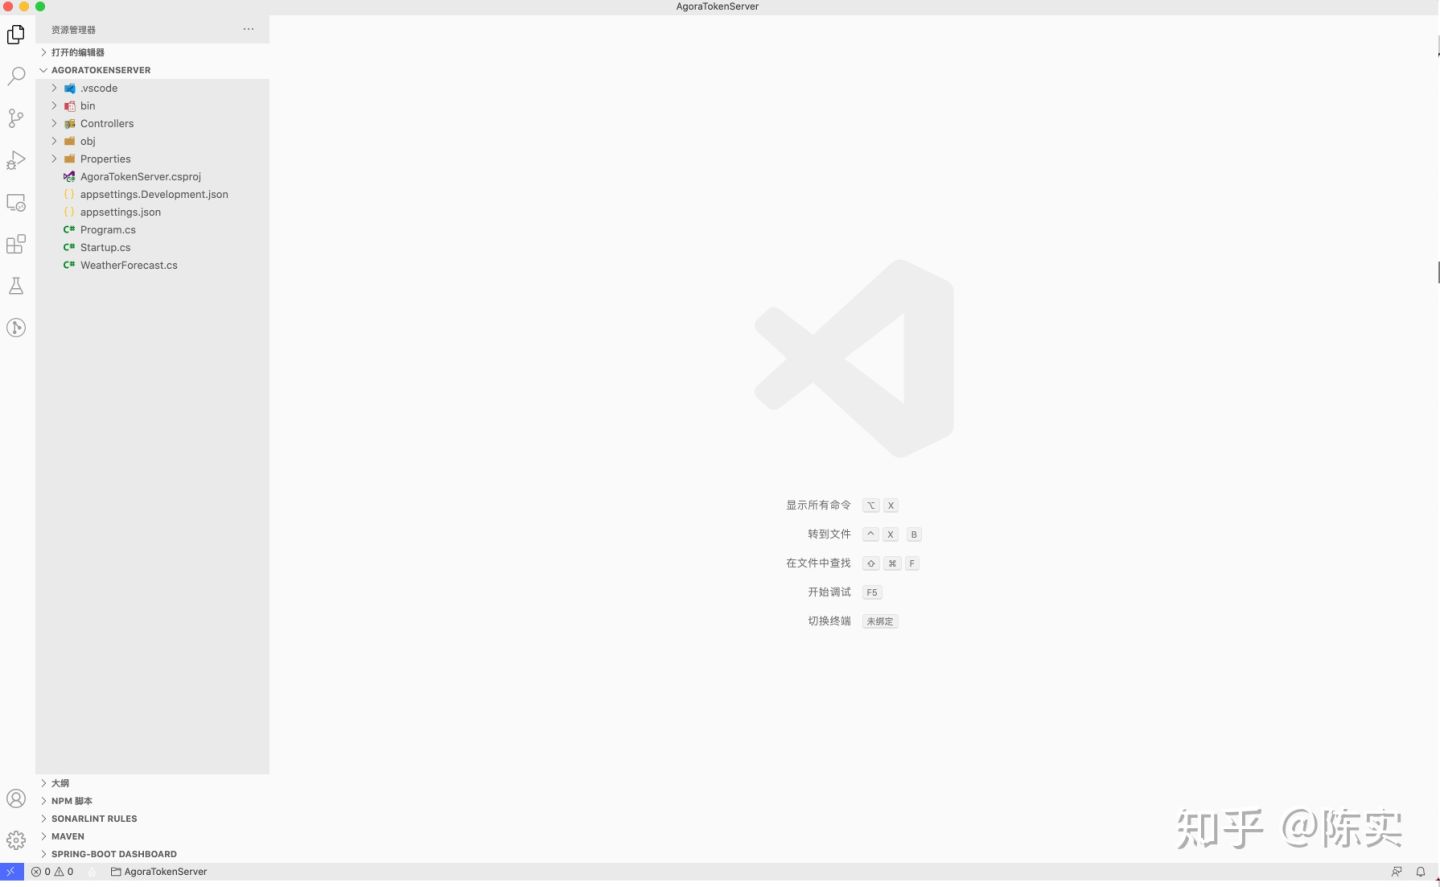
为了方便起见,以下 Visual Studio Code 将简称为 vscode。此时整个项目的目录结构应该如下图所示:
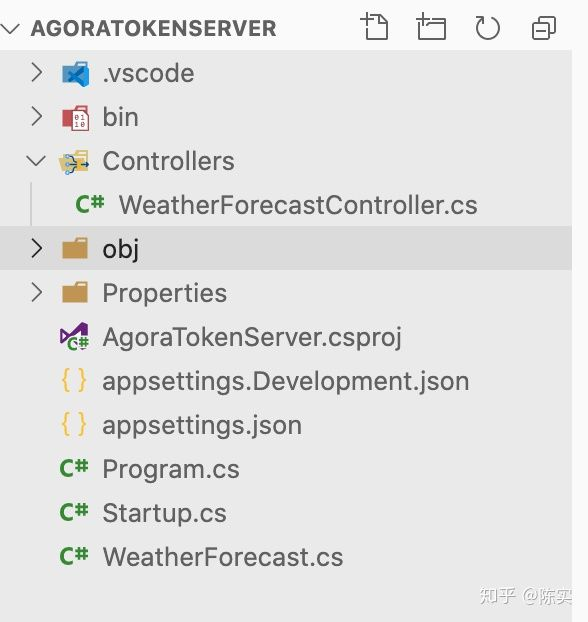
我们将 WeatherForecast.cs 与 Controllers/WeatherForecastController.cs 删除,稍后我们将建立起自己的服务。
开发
引入工具代码
Agora 在其AgoraIO in GitHub中提供了 AccessToken 的 C# 实现,我们可以直接使用它。
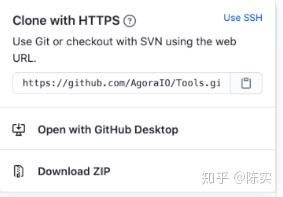
- 进入AgoraIO in GitHub,点击页面上那个绿色的Code按钮
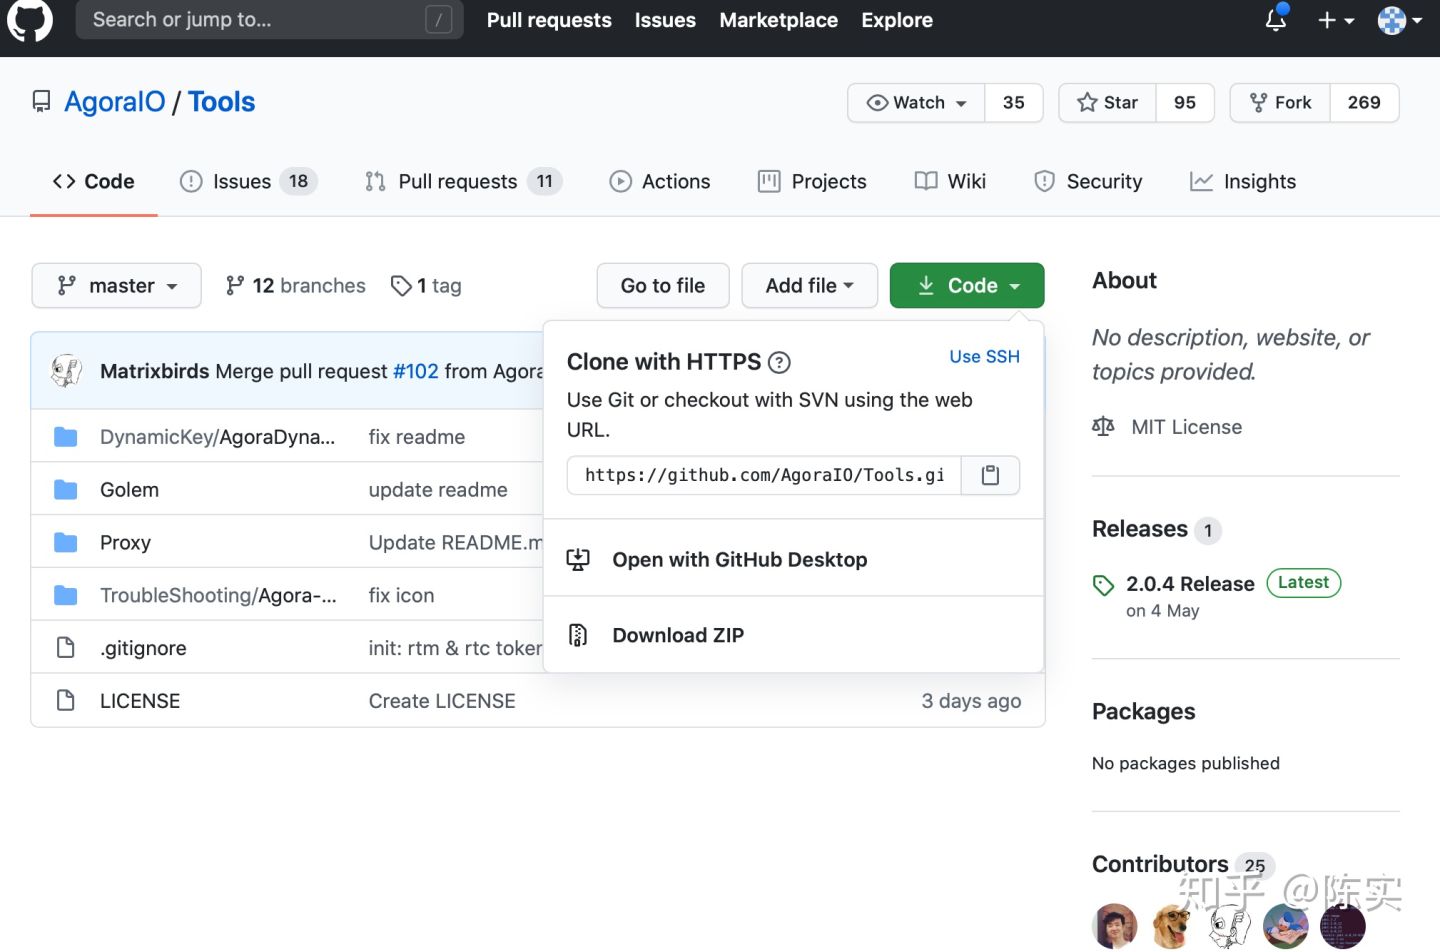
- 如果你会 Git 那么可以直接在其他目录中, 注意不要直接在上一章节建立的 AgoraTokenServer 项目目录中 ,把项目克隆下来。
git clone https://github.com/AgoraIO/Tools.git 如果你不会 Git ,可以直接点击 Download ZIP 将其下载下来并解压缩。
- 进入刚刚 Git 克隆或者下载解压缩后的目录
cd Tools/DynamicKey/AgoraDynamicKey/csharp/src/AgoraIO 将其中的 Common、Extensions、Media、Utils 四个目录直接拷贝至你创建的 AgoraTokenServer 目录下,之后你的 AgoraTokenServer 目录结构应该是如下图这样子的:

解决依赖
你会发现上图中 Media/AccessToken.cs 是红色的,那是因为这个项目依赖于Crc32.NET这个包,如果你正确的安装了 .NET Core 的运行时和命令行工具的话 我们直接使用命令行将其安装就可以了。
进入 AgoraTokenServer 项目的根目录下,运行如下命令:
dotnet add package Crc32.NET这样子我们唯一一个外部依赖包就解决了。
设置 AppID 与 AppCertificate
- 在通常环境中 AppCertificate 应当保存在安全性较高的服务端,不宜通过客户端请求进行传输,在 .NET Core 中这种设置通常可以保存在 appsetting.json 中。 下面 appsetting.json 代码中的 AppID 和 AppCertificate 为示例,请在使用中替换为自己使用的对应 AppID 和 AppCertificate。
 {
 "AppSettings": {
  "AppID": "970CA35de60c44645bbae8a215061b33",
  "AppCertificate": "5CFd2fd1755d40ecb72977518be15d3b"
 },
 "Logging": {
  "LogLevel": {
  "Default": "Information",
  "Microsoft": "Warning",
  "Microsoft.Hosting.Lifetime": "Information"
   }
 },
 "AllowedHosts": "*"
} - 建立配置类
在 Utils 目录下创建一个名为 AppSettings.cs 的文件,文件内容为:
 namespace AgoraTokenServer.Utils
 {
  public class AppSettings
    {
  public string AppID { get; set; }
  public string AppCertificate { get; set; }
    }
} - 注入配置类
ASP.NET Core 使用依赖注入来解决整个程序的依赖问题,通过这个机制我们可以很方便的把上面定义的配置注入进去。依赖注入需要在 Startup.cs 文件中添加自定义的配置类,添加后 Startup.cs 文件内容如下:
 using AgoraTokenServer.Utils;
 using Microsoft.AspNetCore.Builder;
 using Microsoft.AspNetCore.Hosting;
 using Microsoft.Extensions.Configuration;
 using Microsoft.Extensions.DependencyInjection;
 using Microsoft.Extensions.Hosting;

 namespace AgoraTokenServer
 {
  public class Startup
    {
  public Startup(IConfiguration configuration)
        {
  Configuration = configuration;
        }

  public IConfiguration Configuration { get; }

  // This method gets called by the runtime. Use this method to add services to the container.
  public void ConfigureServices(IServiceCollection services)
        {
  services.AddCors(); //添加跨域请求
  services.AddControllers();
  services.Configure<AppSettings>(Configuration.GetSection("AppSettings")); //添加程序配置
        }

  // This method gets called by the runtime. Use this method to configure the HTTP request pipeline.
  public void Configure(IApplicationBuilder app, IWebHostEnvironment env)
        {
  if (env.IsDevelopment())
            {
  app.UseDeveloperExceptionPage();
            }

  app.UseHttpsRedirection();

  app.UseRouting();

  app.UseCors(x => x
                    .AllowAnyOrigin()
                    .AllowAnyMethod()
                    .AllowAnyHeader());

  app.UseAuthorization();

  app.UseEndpoints(endpoints =>
            {
  endpoints.MapControllers();
            });
        }
    }
 }
创建 Model
我们先定义两个对象来描述接受的内容和返回的结果。首先建立一个名为 Models 的目录,再在目录下创建两个文件。
- 请求对象文件
Path: /Models/AuthenticateRequest.cs
在 Models 目录下创建 AuthenticateRequest.cs 文件,文件内容为:
 using System.ComponentModel.DataAnnotations;

 namespace AgoraTokenServer.Models
 {
  public class AuthenticateRequest
    {
        [Required]
  public string channel { get; set; }
        [Required]
  public dynamic uid { get; set; }

  public uint expiredTs { get; set; } = 0;

  public int role { get; set; } = 1;
    }
 }
因为 Agora 的用户标识有两种类型,一种是 uint 型,一种是 string 型的,所以这里直接使用 dynamic 类型来同时兼容两种类型。
- 回应对象
Path: /Models/AuthenticateResponse.cs
在 Models 目录下创建 AuthenticateResponse.cs 文件,文件内容为:
 namespace AgoraTokenServer.Models
 {
  public class AuthenticateResponse
    {
  public string channel { get; set; }
  public dynamic uid { get; set; }
  public string token { get; set; }
    }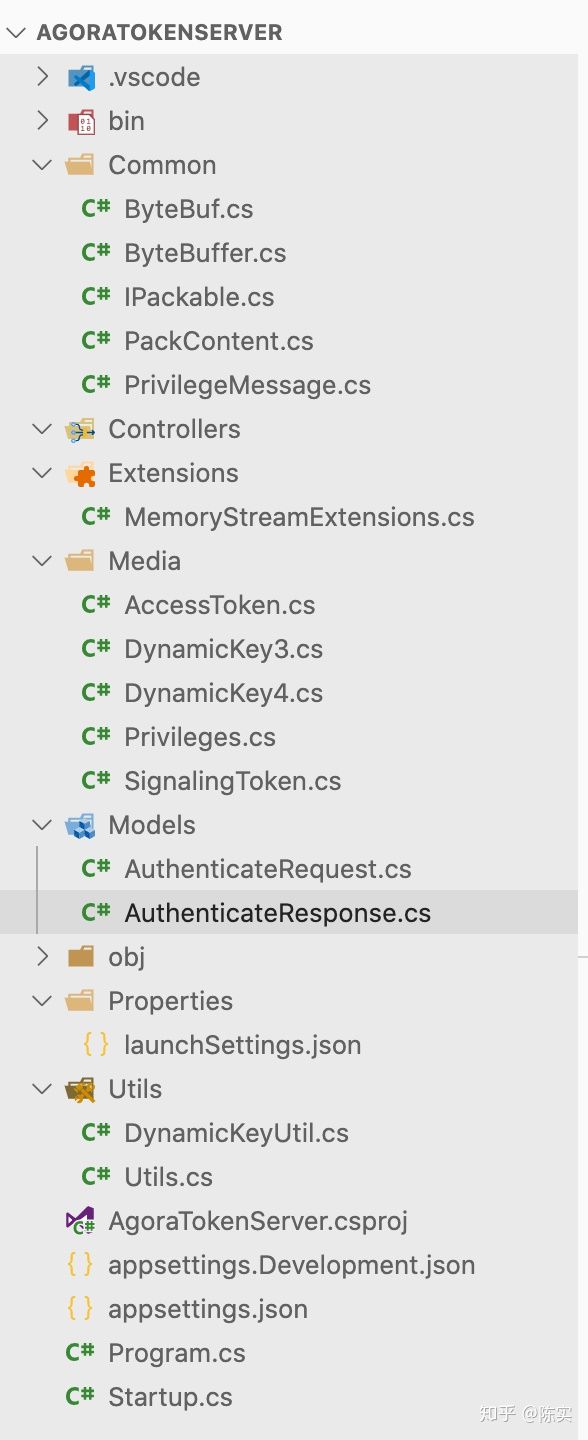
} - 现在项目的结构如下图:
创建服务
- 现在我们创建一个控制器来提供服务,首先在 AgoraTokenServer 项目的 Controllers 目录下建立一个名为 AccessTokenController.cs 的文件。
Path: /Controllers/AccessTokenController.cs
 using AgoraTokenServer.Models;
 using Microsoft.AspNetCore.Mvc;

 namespace AgoraTokenServer.Contollers
 {
    [ApiController]
    [Route("[controller]")]
  public class AccessTokenController : ControllerBase
    {
    }
} - 添加程序配置
 using AgoraTokenServer.Utils;
 using Microsoft.AspNetCore.Mvc;
 using Microsoft.Extensions.Options;

 namespace AgoraTokenServer.Contollers
 {
    [ApiController]
    [Route("[controller]")]
  public class AccessTokenController : ControllerBase
    {
  private readonly AppSettings appSettings;

  public AccessTokenController(IOptions<AppSettings> appSettings)
        {
  this.appSettings = appSettings.Value;
        }

    }
} - 添加请求处理部分
 using System.Net;
 using System.Text.Json;
 using AgoraIO.Media;
 using AgoraTokenServer.Models;
 using AgoraTokenServer.Utils;
 using Microsoft.AspNetCore.Mvc;
 using Microsoft.Extensions.Options;

 namespace AgoraTokenServer.Contollers
 {
    [ApiController]
    [Route("[controller]")]
  public class AccessTokenController : ControllerBase
    {
  private readonly AppSettings appSettings;

  public AccessTokenController(IOptions<AppSettings> appSettings)
        {
  this.appSettings = appSettings.Value;
        }

        [HttpPost]
  public ActionResult<AuthenticateResponse> index(AuthenticateRequest request)
        {
  if (string.IsNullOrEmpty(appSettings.AppID) || string.IsNullOrEmpty(appSettings.AppCertificate))
            {
  return new StatusCodeResult((int)HttpStatusCode.PreconditionFailed);
            }

  var uid = request.uid.ValueKind == JsonValueKind.Number ? request.uid.GetUInt64().ToString() : request.uid.GetString();
  var tokenBuilder = new AccessToken(appSettings.AppID, appSettings.AppCertificate, request.channel, uid);
  tokenBuilder.addPrivilege(Privileges.kJoinChannel, request.expiredTs);
  tokenBuilder.addPrivilege(Privileges.kPublishAudioStream, request.expiredTs);
  tokenBuilder.addPrivilege(Privileges.kPublishVideoStream, request.expiredTs);
  tokenBuilder.addPrivilege(Privileges.kPublishDataStream, request.expiredTs);
  tokenBuilder.addPrivilege(Privileges.kRtmLogin, request.expiredTs);
  return Ok(new AuthenticateResponse
            {
  channel = request.channel,
  uid = request.uid,
  token = tokenBuilder.build()
            });
        }
    }
 }
在请求处理中,直接调用了从 AgoraIO 上下载的代码,并且在没有配置 AppID 和 AppCertificate 情况下会回报 412 错误。
同时,这个示例代码中直接将[kJoinChannel, kPublishAudioStream, kPublishVideoStream, kPubishDataStream, kRtmLogin] 的权限一次性给出来,你可以根据直接的需要,在 AuthenticateRequest 中添加权限申请的字段, 实现权限的申请功能。
 [HttpPost]
 public ActionResult<AuthenticateResponse> index(AuthenticateRequest request)
 {
  if (string.IsNullOrEmpty(appSettings.AppID) || string.IsNullOrEmpty(appSettings.AppCertificate))
  {
  return new StatusCodeResult((int)HttpStatusCode.PreconditionFailed);
  }

  var uid = request.uid.ValueKind == JsonValueKind.Number ? request.uid.GetUInt64().ToString() : request.uid.GetString();
  var tokenBuilder = new AccessToken(appSettings.AppID, appSettings.AppCertificate, request.channel, uid);
  tokenBuilder.addPrivilege(Privileges.kJoinChannel, request.expiredTs);
  tokenBuilder.addPrivilege(Privileges.kPublishAudioStream, request.expiredTs);
  tokenBuilder.addPrivilege(Privileges.kPublishVideoStream, request.expiredTs);
  tokenBuilder.addPrivilege(Privileges.kPublishDataStream, request.expiredTs);
  tokenBuilder.addPrivilege(Privileges.kRtmLogin, request.expiredTs);
  return Ok(new AuthenticateResponse
            {
  channel = request.channel,
  uid = request.uid,
  token = tokenBuilder.build()
            });
 }
编译并运行
.NET Core 的编译和运行只需要通过命令行既可以解决,在 AgoraTokenServer 目录下,直接在命令行中运行
dotnet build就可以编译整个工程了。
运行也很直接,直接在命令行中运行
dotnet run就可以在 https://localhost:5001 和 http://localhost:5000 上运行服务了。
如果你想改缺省的运行端口,推荐直接修改 Path: /Properties/launchSettings.json 文件中的 AgoraTokenServer 这一节的 applicationUrl 参数,其内容如下:
"AgoraTokenServer": {
 "commandName": "Project",
 "launchBrowser": true,
 "launchUrl": "weatherforecast",
 "applicationUrl": "https://localhost:5001;http://localhost:5000",
 "environmentVariables": {
 "ASPNETCORE_ENVIRONMENT": "Development"
  }
}
因为修改过的 launchSettings.json 本身也会做为一个配置文件发布在最终运行目录中,这样子就不用吧端口写死在源代码中,或者在 Program.cs 中额外添加代码了。
测试结果
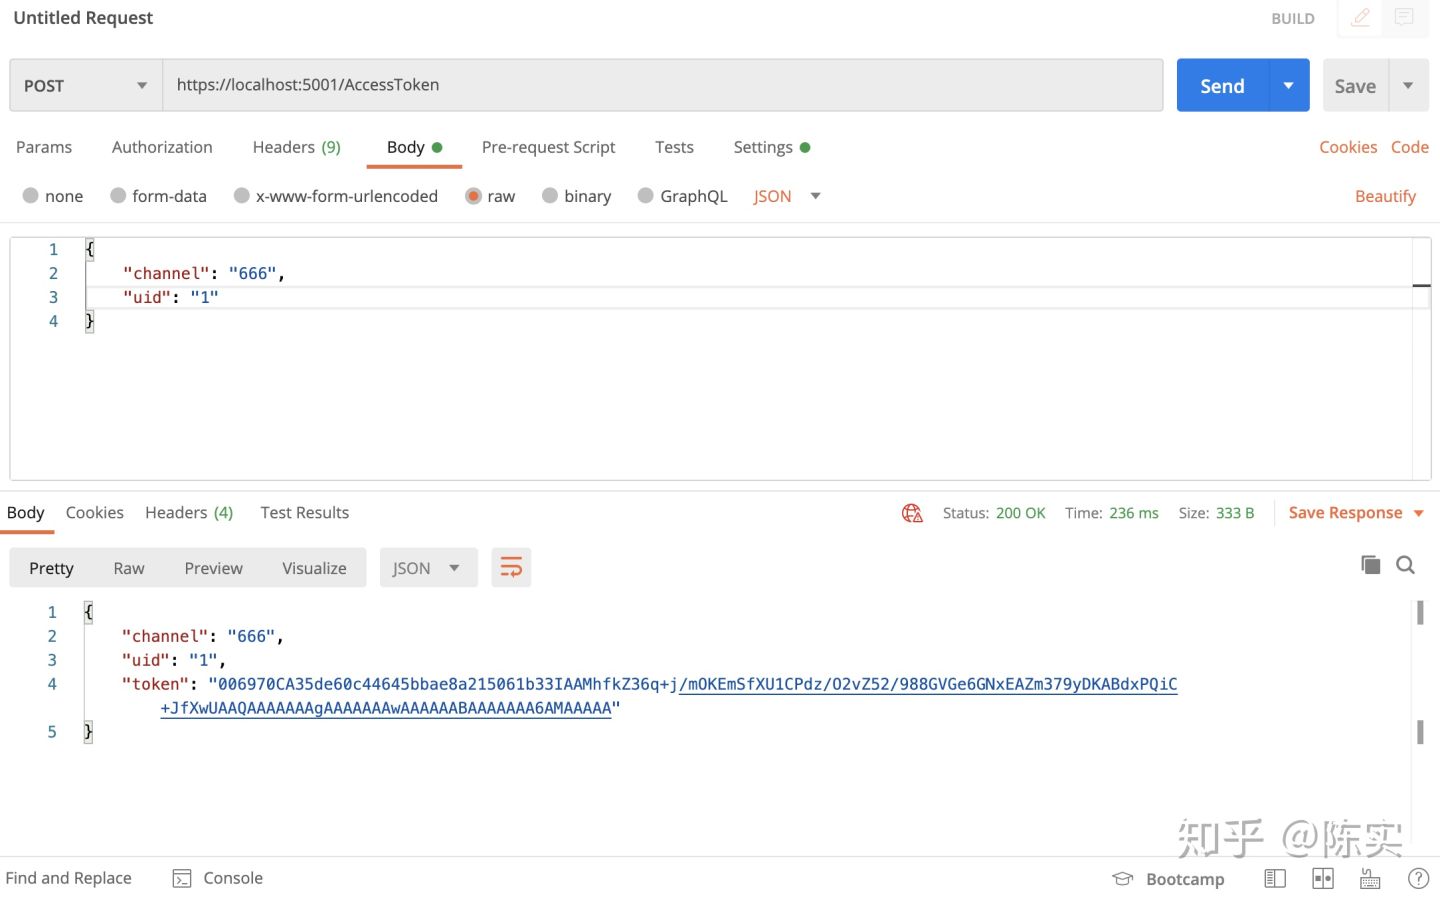
在本文中,使用Postman对服务进行测试,大家可以使用自己习惯的工具。在具体的请求中,因为 expiredTS 和 role 在程序中有缺省值,所以请求中就可以忽略,并且在现阶段,role 只有一个值,所以推荐可以暂时忽略这个。而 expiredTS 的具体用法,可以参考Agora官方网站的生成Token一文中的说明。

具体的 Postman 请求结果如下图所示。
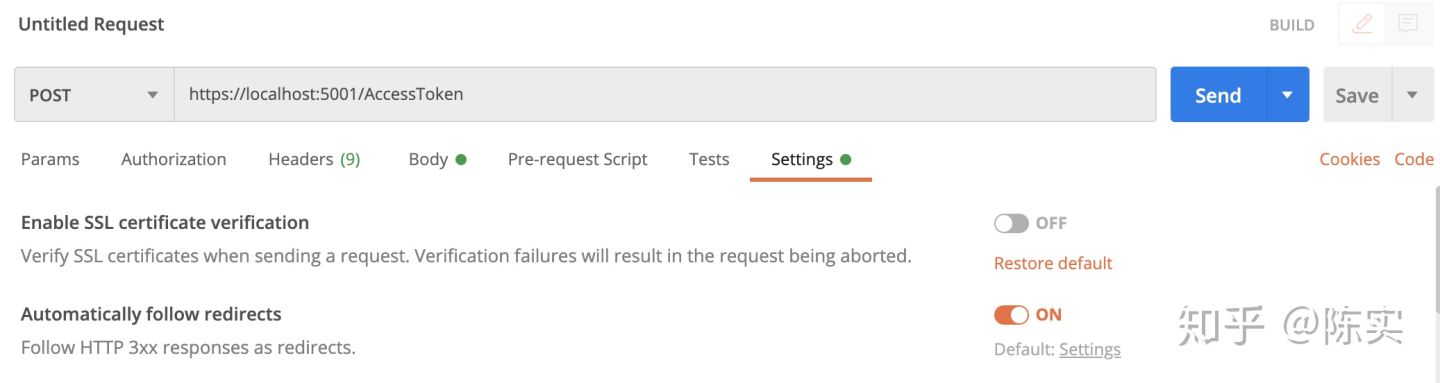
如果你在使用 Postman 发送请求的时候发生了下图的错误:
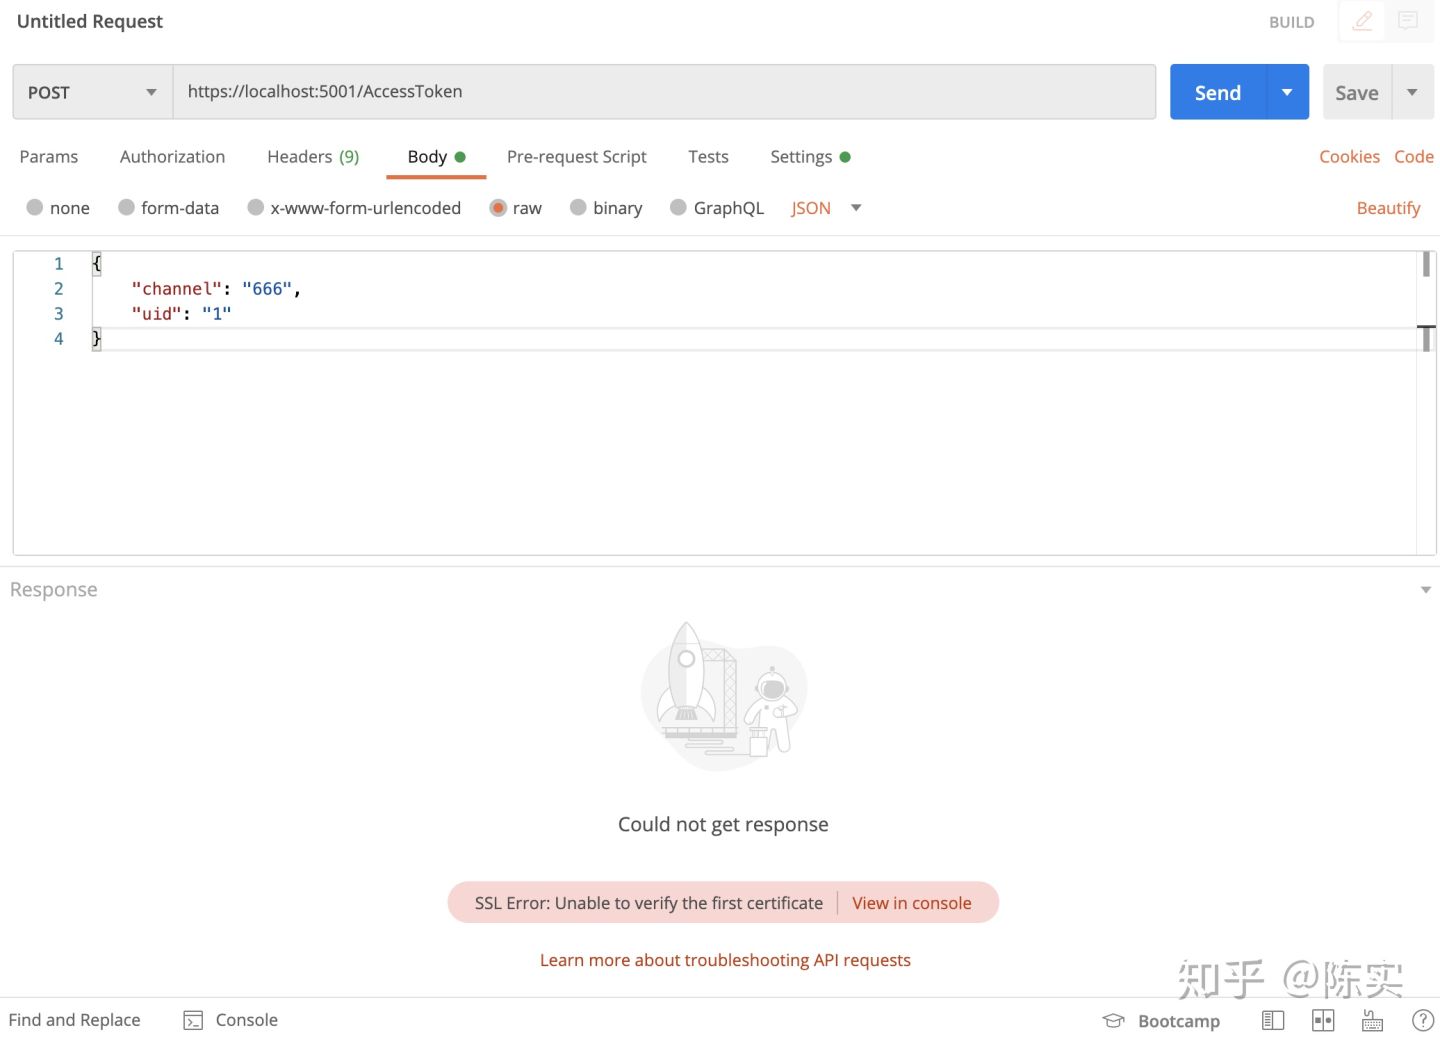
是因为你现在访问的 https 链接使用的证书是无效的,实际使用中你需要部署真实的证书,测试阶段你可以通过下图的 Settings 按钮将第一个 Enable SSL certificate verification 关闭
完成
到现在为止,基于 .NET Core 的 Agora Token 服务已经开发完成。在实际使用中,还需要添加安全机制,这个可以根据你自己的具体架构情况进行完善。
.NET Core 的 docker 化可以参考微软的 Docker 容器 这编文章。
本文的所有代码都可以在 GitHub 上下载。
原文链接:https://dev.agora.io/category/精选文章/blog/19790

